The new optimised Alternative boat build
When I play golf, if I drive off the tee and lose my ball because of an errant swing, why is it that my second attempt is nearly always perfect making me wonder why didn't I swing like that on my first shot!
It's kind of like that when you build a second boat. The first attempt is full of small errors, air bubbles, lifted glass at the bow and stern, too much epoxy used, etc. The second boat has errors but it is much better and lighter.
I started the second boat yesterday afternoon and unwrapped it this morning and what a beauty she looks. If you are interested, here is what I did with a few pictures.
I started by repairing the old hull plug, patching up some damage when I cut the previous boat off the plug with a dremel. After a rub down and 5 coats of release wax it was good as new and ready for the layup.
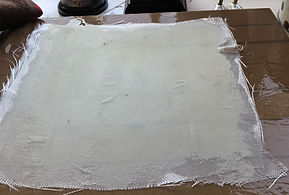
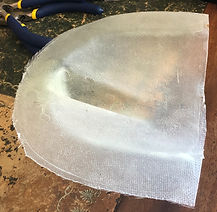
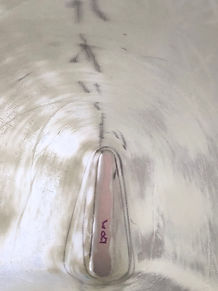
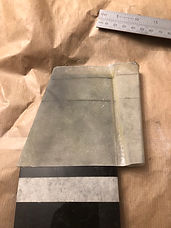
I cut out 3 sheets of 124gm S glass from a paper pattern I made earlier. I acquired 3 sheets of brown paper which were from a delivery of an old flower arrangement (my wife's!). With care, I cut the glass cloth straight onto the brown paper from the paper pattern I made earlier. The cloth was cut with no mess. In addition to the cutting, I drew a centre line with a felt pen and perpendicular lines (to the centreline) for the bow, stern and edge of the foredeck. This is done to allow easy alignment (when laying down the cloth onto the plug) with a centreline drawn down the keel of the hull along with a mark to indicate the foredeck. The brown paper not only seperated the 3 layers of cloth but also allows the cloth to be rolled up and carried as well as protecting the edges, keeping the cloth flat and clean. (Image 1)

Last summer on the first boat build, I cut the glass outside on a table, did not use any paper or protective cover and ended up with strands of glass fibre all over the patio!
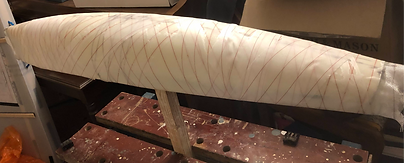
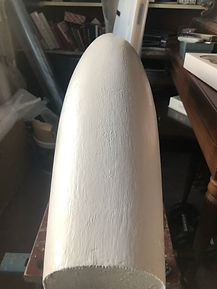
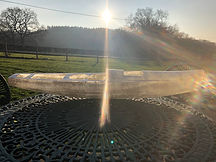
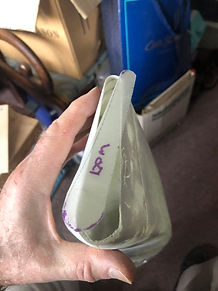
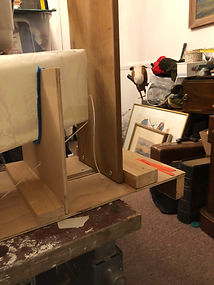
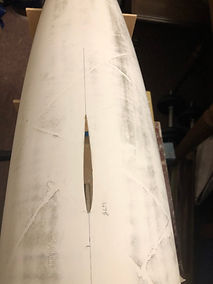
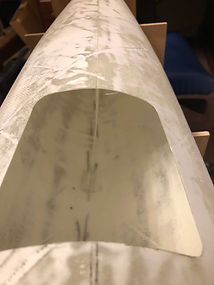
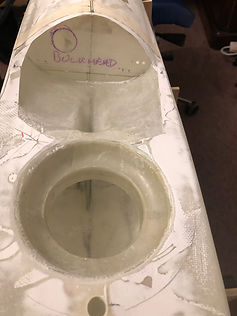
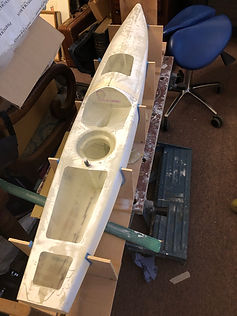
With the cloth prepared, I was ready to lay the hull up in the garden shed. Yesterday it was about 12 degrees which is just warm enough to work with epoxy. I needed a workbench to clamp the hull upside down (Image 4), a piece of wood hanging from the shed ceiling to screw the plug support post to work on the deck (Image 3), paper towel to wipe up mess, acetone for cleaning, nitril gloves to protect my hands, West System epoxy (slow cure), three plastic pots (I use fromage frais pots), a 2 inch paint brush and an aluminium roller for removing air bubbles, peel ply for wrapping the epoxy, screwdriver and electric drill for mounting and dismounting the plug. With all the bits together on site, I was ready to go. After mixing the epoxy using the self measuring plungers that you screw on the resin and hardener tins (3 pushes of the plunger will do one layer of glass) I applied resin to the hull side of the plug, being careful to wet the curves of the deck. The epoxy will not lie smooth on the wax and will pull back into globules looking a bit messy but it won't matter. Taking the first layer of cloth and with the boat mounted upside down on the workbench, hold it over the hull aligning the centreline, bow, stern and foredeck marks before laying the cloth down on the epoxied plug. (Image 2 3 and 4)


Gently smooth out the cloth with the paint brush and work out from the centre until the cloth is flat all over. This is quite fiddly but by taking time and being patient the cloth will lay out perfectly. Next step is to go over the cloth with the paint brush (be very gentle) and wetting the cloth where dry, removing air bubbles as you go. Use the epoxy sparingly as excess resin just adds weight. Finally go over the hull with the aluminium roller to get any missed air bubbles.
Now remove the plug from the workbench and screw to the bar dropping from the shed ceiling. Initially fix the hull upside down and then carefully allow the plug to rotate down while supporting the cloth over the deck, until the deck is level. (In my first build last summer, I picked the plug from the workbench after wetting the cloth on the hull, rotated it so the deck was uppermost, raised it up to the supporting bar and the glass cloth fell off onto the floor. You have been warned!)
Before you work the cloth into the deck with the paintbrush, cut away any excess. On the first layer I used a 1 inch overlap. On the second layer, I butt the ends of the cloth (ie no overlap) and on the third layer use an overlap again. In this way you avoid too much weight along the centreline of the deck. On my first boat I ended up with 6 layers of cloth on the centreline which produced a strong boat but heavy in the ends.
Work the cloth into the deck with the paint brush in the same way as the hull, until flat and smooth. Sorry there are no pictures of this as my gloves were coated in epoxy at the time!
Check over the hull and deck in good light to make sure there are no air bubbles and the cloth is tightly bonded at the bow and stern.
Leave the plug until the epoxy remaining in your mixing jug starts to go stringy. When this happens, the first layer of cloth will be stuck nicely to the plug and won't move when you apply the second layer. The longer you can leave it between layers the better. Half an hour should be long enough.
Wash your paint brush, gloves and roller in acetone and mix the second batch of epoxy. Bin the 1st mixing pot.
For the second layer, drape the cloth over the hull taking care with the alignment marks and brush out as before using just enough epoxy to wet the cloth.
Repeat for the third layer remembering to clean tools in between. I use four plunges of epoxy for the last layer because I wanted the outer layer slightly wetter. Any excess would be absorbed by the peel ply.
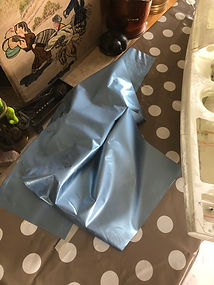
Finally wrap in peel ply. I used 10 metres of 100mm wide. Overkill I know but it did an amazing job even though the hull look a bit mummy like. (Image 5)
At the same time as laying up the hull, I made the components in Image 8. 9. 10. 14, 15 and 18. The fin box was Dave Creed's work.
A thin sheet for the bow stern and bulkheads
The mould for the deck layout above the fin box and final deck

Strip of S glass for bonding the deck

Reinforcement for the fordeck understanding the jib tack eyes

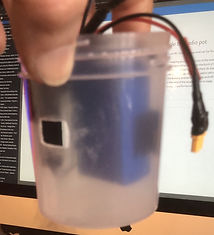
The radio pot and forward bulkhead

Paper template for forward bulkhead

I peeled the peel ply off this morning to discover a hull with no air bubbles, perfect adhesion at the bow, stern and foredeck.
In all the process took about 3 hours
All I need now are two coats of epoxy primer rubbed smooth and I am ready to pop the hull off the plug. Here is the rough finish prior to sanding
The finished hull popped off the mould safely in its supporting jig with the deck taped together to hold it secure

It all looks good and I know that the hull is useable so I can pay the second design fee and fit the boat out.
Having added two coats of epoxy primer, it is time to rub it all back to the surface of the S glass to make the hull as light and as smooth as possible. Up to two hours sanding. Joy! but the end result is worth the effort.
After painting on 250gms of High build epoxy primer, I sanded 200gms off on Saturday. The result is a very light smooth hull which you can see through.
The hull will remain in this condition until the deck has been finished and all the holes drilled. Then it is time for the vinyl wrap in metallic blue. Can't wait to see how it ends up when cut off the mould.
Once the hull is off the mould it goes straight into a support jig, with the frames cut from the design plan. This jig is marked and used for setting the fin position and rudder. (Image 7)
The foredeck and aft deck is bonded using 1 layer of 124gm s cloth (Image 13). The hull is strong and ready for the fin box, bulkhead and adjoining deck and radio pot to be bonded in.
On Sunday I cut all the access holes, (Image 33) and added two further layers of S glass around the fin box area in the hull, bonded the deck with an extra layer of S glass at the jib take off point and fitted the transom
I put small reinforcing plates in the deck at the stern and put 1 layer of S glass about 1 inch wide down the centre of the foredeck.
All up weight of the hull with all glass infrastructure but ex fitting will be around 400gms, considerably lighter than my first hull especially in the ends but heavier than the professional hulls. Having said that the hull is very strong, light in the ends and should be competitive.
Todays job is to fit the fin, bulkhead, deck moulding and radio pot and a post for the jib tack take off point. On course to finished hull by end of week.
A long day sealing the bow and stern, (Image 18 and 19) strengthening the foredeck, building an ultra light foredeck post (Image 14), cutting a slot in the hull (Image 21), measuring and shaping the forward bulkhead (Image 15 and 16) , fin case and deck. Lots of pictures below in a slightly random order.


Tomorrow I hope to bond in all the pieces and then the only other major jobs are to fit the plates for the servo and rudder stock which will likely be done on Wednesday. Then a final rub down and drill all the holes for the deck fittings. Finally after that I can wrap the boat in its metallic blue vinyl. Its an experiment but I am sure it will be worth the effort and if it doesn't work I can always paint it.
Fitting the fin
Yesterday was all about getting the fin box fitted. Alignment of the fin in exactly the right position with the design measurements and having it vertical is the most critical job on the boat. Get this wrong and the boat will be hard to balance and may sail higher on one tack that the other.
The boat in my jig is set up to be level on its water line, ie there is a horizontal line connection the bottom of the bow and bottom of the stern. The leading edge of the fin sits perpendicular to this line. Get the jig right and everything is easy. On the plan there are two measurements, one from the hull to the leading edge of the fin and then one from the tip of the bow to the bottom of the fin where it enters the bulb. Set these measurements and the fin leading edge should be perpendicular tp the waterline of the boat. I was less than a degree out. See image 24-27.
To get the fin exactly vertical looking from the stern, I level the boat at the shroud point and use a level on the fin to make vertical and then use masking tape to secure it. Gravity helps in picture 27.
The string in the picture is used to measure from the bow to the fin but I did have to make holes in the jig.
Tomorrow, I can fit the final pieces of the deck and the bulkhead.


Finishing the bonding
Yesterday was gluing day. Fitted the forward deck, pre drilled bulkhead, radio pot holder and mainsheet post.
Only one small error. I forgot to seal and reinforce the top of the fin box
I have the fiddliest job to do that today plus final fit for the servo mount and rudder stock mount. Nest jobs are to pre drill all the fitting holes, apply filler where required and final sand ready to apply wrap.
When fitting the mainsheet post, I accurately measured a centreline at the deck and then did the same with a string 6 inches off the deck. Then using a set square I was able to get the mainsheet post upright and aligned with the fin case, back stay, jib sheet eyes and jib attachment points which are all marked up. Fingers crossed the sails will set the same on both tacks.
Hull weight so far is 420gms. Old hull weight at this point 620gms. Maybe 350gms is achievable with a slightly thinner layup. I was generous with the epoxy at the base of the fin but this is where the correctors with be anyway. Estimate approx 400gms of correctors will be required.
Tidying up
Final bit of reinforcement went in yesterday. Not much to show as boat looks similar to day before but with addition of rudder stock and servo supports. Giving the hull a good t cut to look for any rough spots and then the metallic blue wrap
Little remaining jobs to do after the wrap like final fit of fin and add the electronics and fittings


Finished the build
With the final jobs knocked off on Friday the hull is ready for wrapping. I spent today sanding and cleaning the hull and deck, final fit of the fin and rudder which ended up exactly according to the design plans and are both in line with each other. Tomorrow will be wrapping day.
Ordered the new PG tubes from Potters Solutions and a couple of bits and bobs from Sailsetc. Once the boat is wrapped I can set up the new rigs using existing fittings apart from the shrouds. Then a bit of in house tuning and I am ready to get on the water.
Its not a wrap
The wrap failed. There is so much curvature in the hull and deck, you need to stretch the wrap so much before application and you need several pairs of hands, so it's back to the paint spraying.
The boat is finished bar the spray and as Mr Gibson said you are far better off with paint as damaged vinyl is impossible to repair. He should know he used to wrap 18 footers amongst other things. Why didn't I speak to him first.
The dream was there, the experience was missing. Loved the metallic finish but it is not to be.
Onwards and upwards and off to watch the 18 footers race round Sydney harbour in the JJ Giltinan. On the computer of course
Decision time on paint
It has been a long process trying to sort the paint for the boat. I could use my tried and tested 2 pack polyurethane which I know is hard durable and the right solution, but I do want to spray to keep the decks looking smart. As you know I tried using vinyl wrap but the curves of the boat proved too much.
The search took me to spray cans of epoxy, enamel and other finishes but I came across an industrial acrylic based paint in a spray can. It is designed for repair of industrial coatings indoor or external. Its a risk I know but I prepared a sample this afternoon and it has great colour, is hard, flexible, great UV properties and resistant to scratches. The date sheet is here:
http://www.farnell.com/datasheets/3165638.pdf
So on it goes tomorrow and we will see how the paint performs. The pictures below show the new spray look on a sample and the effect I am trying to avoid when painting 2 pack Polyurethane. I will show you the result tomorrow and then see how it wears when we get sailing.
Den nya optimerade alternativa båtbyggnaden
När jag spelar golf, om jag kör av tee och tappar min boll på grund av en felaktig svängning, varför är det så att mitt andra försök alltid är perfekt får mig att undra varför jag inte svängde så på mitt första skott!
Det är ungefär så när man bygger en andra båt. Det första försöket är fullt av små fel, luftbubblor, lyftande glas vid fören och akter, för mycket epoxi används etc.
Jag startade den andra båten igår eftermiddag och packade upp den i morse och vilken skönhet hon ser ut. Om du är intresserad, här är vad jag gjorde med några bilder.
Jag började med att reparera den gamla skrovpluggen, lappa upp en del skador när jag klippte bort den tidigare båten med en dremel. Efter en gnidning och 5 lager släppvax var det gott som nytt och klart för uppläggningen.
Jag klippte ut 3 ark 124gm S -glas från ett pappersmönster som jag gjorde tidigare. Jag skaffade 3 ark brunt papper från en leverans av ett gammalt blomsterarrangemang (min frus!). Med omsorg skär jag glasduken rakt på det bruna papperet från pappersmönstret jag gjorde tidigare. Tyget klipptes utan röra. Förutom skärningen ritade jag en mittlinje med en filtpenna och vinkelräta linjer (mot mittlinjen) för fören, akter och kant på fördäcket. Detta görs för att möjliggöra enkel inriktning (när du lägger tyget på pluggen) med en mittlinje neddragen i skrovets köl tillsammans med ett märke för att ange fördäcket. Det bruna pappret separerade inte bara de tre tygskikten utan gör också att duken kan rullas ihop och bäras samt skydda kanterna, hålla duken platt och ren. (Bild 1)
Förra sommaren på den första båtbyggnaden skar jag glaset utanför på ett bord, använde inget papper eller skyddskåpa och slutade med trådar av glasfiber över hela uteplatsen!
Med trasan klar var jag redo att lägga skrovet i trädgårdsboden. Igår var det cirka 12 grader vilket är lagom varmt för att arbeta med epoxi. Jag behövde en arbetsbänk för att klämma upp skrovet upp och ner (bild 4), en träbit som hängde från taket för att skruva pluggstödsstolpen för att fungera på däck (bild 3), pappershandduk för att torka upp röra, aceton för rengöring , nitrilhandskar för att skydda mina händer, West System epoxi (långsam härdning), tre plastkrukor (jag använder fromage frais -krukor), en 2 tums pensel och en aluminiumrulle för att ta bort luftbubblor, skal för att packa in epoxin, skruvmejsel och elektrisk borr för montering och demontering av kontakten.
Med alla bitar ihop på plats var jag redo att gå. Efter att ha blandat epoxin med hjälp av de självmätande kolvarna som du skruvar på harts- och härdningsformarna (3 tryck på kolven gör ett lager glas) applicerade jag harts på pluggens skrovsida, var noga med att blöta kurvorna på däck. Epoxin kommer inte att ligga smidigt på vaxet och kommer att dra tillbaka till kulor som ser lite rörigt ut men det spelar ingen roll. Ta det första tygskiktet och med båten monterad upp och ner på arbetsbänken, håll den över skrovet och rikta in mittlinjen, fören, akter- och fördäckmärkena innan du lägger tyget på den epoxade pluggen. (Bild 2 3 och 4)
Släta försiktigt ut trasan med penseln och träna från mitten tills duken är platt överallt. Detta är ganska jobbigt men genom att ta tid och ha tålamod kommer duken att lägga sig perfekt. Nästa steg är att gå över duken med penseln (var mycket försiktig) och väta trasan där den är torr, ta bort luftbubblor när du går. Använd epoxin sparsamt eftersom överskott av harts bara ökar vikten. Slutligen gå över skrovet med aluminiumrullen för att få eventuella missade luftbubblor.
Ta nu bort kontakten från arbetsbänken och skruva fast den i stången från taket. Fixera inledningsvis skrovet upp och ner och låt sedan försiktigt pluggen rotera nedåt medan du stöder duken över däcket tills däcket är plant. (I mitt första bygge förra sommaren plockade jag ut kontakten från arbetsbänken efter att ha fuktat trasan på skrovet, roterat det så att däcket var överst, lyfte upp det till stödstången och glasduken föll ner på golvet. Du har varnas!)
Innan du torkar in duken i däcket med penseln, skär bort eventuellt överskott. På det första lagret använde jag en 1 tum överlappning. På det andra lagret stöter jag ändarna på duken (dvs ingen överlappning) och på det tredje lagret använder jag en överlappning igen. På så sätt slipper du för mycket vikt längs däckets mittlinje. På min första båt hamnade jag med 6 lager tyg på mittlinjen som gav en stark båt men tung i ändarna.
Arbeta in duken i däcket med penseln på samma sätt som skrovet, tills det är plant och jämnt. Tyvärr finns det inga bilder på detta eftersom mina handskar var belagda med epoxi vid den tiden!
Kontrollera över skrovet och däcket i gott ljus för att se till att det inte finns några luftbubblor och att duken sitter tätt vid fören och akter.
Lämna kontakten tills epoxin som återstår i din blandningskanna börjar bli trådig. När detta händer kommer det första tygskiktet att klibba fast ordentligt på pluggen och rör sig inte när du applicerar det andra lagret. Ju längre du kan lämna den mellan lagren desto bättre. En halvtimme ska vara tillräckligt lång.
Tvätta din pensel, handskar och rulle i aceton och blanda den andra omgången epoxi. Fyll den första blandningsgrytan.
För det andra lagret, dra duken över skrovet var noga med inriktningsmärkena och borsta ut som innan med tillräckligt med epoxi för att blöta trasan.
Upprepa för det tredje lagret och kom ihåg att rengöra verktyg emellan. Jag använder fyra stötar av epoxi för det sista lagret eftersom jag ville ha det yttre lagret något fuktigare. Eventuellt överskott skulle absorberas av skalskiktet.
Slå slutligen in skalskiktet. Jag använde 10 meter på 100 mm bred. Overkill jag vet men det gjorde ett fantastiskt jobb trots att skrovet ser lite mummigt ut. (Bild 5)
Samtidigt gjorde jag komponenterna i bild 8. 9. 10. 14, 15 och 18. Finboxen var Dave Creeds arbete.
Jag skalade av skalet i morse för att upptäcka ett skrov utan luftbubblor, perfekt vidhäftning vid fören, akter och fördäck.
Sammantaget tog processen cirka 3 timmar
Allt jag behöver nu är två lager epoxiprimer som gnids mjukt och jag är redo att släppa loss skrovet från kontakten. (Bild 6 och 7)
Om allt ser bra ut och jag vet att skrovet är användbart kan jag betala konstruktionsavgiften och passa båten.
Efter att ha lagt till två lager epoxiprimer är det dags att gnugga allt tillbaka till S -glasets yta för att göra skrovet så lätt och så slätt som möjligt. Upp till två timmar slipning. Glädje! men slutresultatet är värt ansträngningen.
Efter att ha målat på 250 gram högbyggd epoxiprimer slipade jag bort 200 gram på lördagen. Resultatet är ett mycket lätt slätt skrov som du kan se igenom.
Skrovet förblir i detta skick tills däcket är färdigt och alla hål har borrats. Då är det dags för vinylfolien i metallblått. Ser fram emot att se hur det hamnar när formen skärs av.
När skrovet är av formen går det rakt in i en stödjigg, med ramarna skurna från designplanen. Denna jigg är markerad och används för att ställa in finpositionen och rodret. (Bild 7)
Fördäck och akterdäck fästs med 1 lager 124gm tyg (bild 13). Skrovet är starkt och redo för finlådan, skottet och angränsande däck och radiokruka att bindas i.
På söndagen klippte jag alla åtkomsthål, (bild 33) och lade till ytterligare två lager S -glas runt finlådans område i skrovet, limmade däcket med ett extra lager S -glas vid fästets startpunkt och monterade akterspegeln
Jag lade små förstärkningsplattor i däcket vid akterna och lade 1 lager S -glas ca 1 tum brett ner i mitten av fördäcket.
Hela vikten på skrovet med all glasinfrastruktur men ex -montering kommer att vara cirka 400 gram, betydligt lättare än mitt första skrov, särskilt i ändarna men tyngre än de professionella skroven. Med det sagt att skrovet är mycket starkt, lätt i ändarna och ska vara konkurrenskraftigt.
Dagens jobb är att passa fenan, skottet, däckgjutningen och radiopotten och en stolpe för jib tack -startpunkten. På väg till färdigt skrov i slutet av veckan.
En lång dag med försegling av fören och akter, (bild 18 och 19) förstärkning av fördäck, byggande av ultralätt fördäckstolpe (bild 14), kapning av en slits i skrovet (bild 21), mätning och formning av det främre skottet (bild 15 och 16) , fenfodral och däck. Massor av bilder nedan i lite slumpmässig ordning.
Imorgon hoppas jag kunna binda ihop alla bitar och då är de enda andra stora jobben att montera plattorna för servo- och roderbeståndet som sannolikt kommer att göras på onsdag. Sedan en sista gnugga ner och borra alla hål för däckbeslag. Äntligen efter det kan jag slå in båten i sin metallblå vinyl. Det är ett experiment men jag är säker på att det kommer att vara värt ansträngningen och om det inte fungerar kan jag alltid måla det.
Montering av fenan
Igår handlade allt om att få finlådan monterad. Finjustering i exakt rätt läge med konstruktionsmåtten och att ha den vertikal är det mest kritiska jobbet på båten. Om du gör detta fel kommer båten att vara svår att balansera och kan segla högre på den ena käften än den andra.
Båten i min jigg är inställd för att vara jämn på sin vattenlinje, det vill säga det finns en horisontell linjeförbindelse botten av fören och botten av aktern. Finens framkant sitter vinkelrätt mot denna linje. Gör jiggen rätt och allt är enkelt. På planen finns två mått, en från skrovet till framkanten av fenan och sedan en från förspetsen till botten av fenan där den kommer in i glödlampan. Ställ in dessa mätningar och fenans framkant ska vara vinkelrätt mot båtens vattenlinje. Jag var mindre än en examen. Se bild 24-27.
För att få fenan exakt vertikal från akterna, jämnar jag ut båten vid kåpan och använder en nivå på fenan för att göra vertikal och använder sedan maskeringstejp för att säkra den. Gravitation hjälper till på bild 27.
Strängen på bilden används för att mäta från fören till fenan men jag fick göra hål i jiggen.
I morgon kan jag passa de sista bitarna på däcket och skottet.
Avsluta bindningen
Igår var det limningsdag. Monterade framdäck, förborrat skott, radiokrukhållare och huvudark.
Bara ett litet fel. Jag glömde att försegla och förstärka toppen av fenlådan
Jag har det roligaste jobbet att göra det idag plus slutmontering för servomontage och roderfäste. Nestjobb är att förborra alla passande hål, applicera fyllmedel vid behov och slutlig sand redo att applicera omslag.
När jag monterade huvudarkposten mätte jag noggrant en mittlinje vid däcket och gjorde sedan detsamma med en sträng 6 tum från däcket. Med hjälp av en fyrkant kunde jag få huvudarkets inlägg upprätt och i linje med fenfodralet, ryggstödet, jibbladets ögon och fästpunkterna som alla är markerade. Fingrar som korsar seglen kommer att sätta samma på båda spåren.
Skrovvikten är hittills 420 gram. Gammal skrovvikt vid denna tidpunkt 620 gram. Kanske 350 gram kan uppnås med en något tunnare uppläggning. Jag var generös med epoxin vid basen av fenan men det är här rättarna ändå är. Uppskattningsvis kommer cirka 400 gram korrektorer att krävas.
Städar
Den sista förstärkningen gick in igår. Inte mycket att visa eftersom båten ser ut som dagen innan men med tillägg av roder och servostöd. Ger skrovet ett bra t -snitt för att leta efter grova fläckar och sedan den metalliska blå omslaget
Lite återstående jobb att göra efter omslaget som slutlig passform av fenan och lägg till elektronik och beslag.
Bygget klart
När de sista jobben slogs av på fredagen är skrovet klart för inpackning. Jag tillbringade idag slipning och rengöring av skrov och däck, sista passform av fen och roder som slutade exakt enligt designplanerna och är båda i linje med varandra. Imorgon är det inlämningsdag.
Beställde de nya PG -riggarna från Potters Solutions och ett par bitar och bobbar från Sailsetc. När båten väl är inlindad kan jag sätta upp de nya riggarna med hjälp av befintliga beslag bortsett från höljena. Sedan lite in -house tuning och jag är redo att gå på vattnet.
Det är inte en omslag
Omslaget misslyckades. Det är så mycket krökning i skrovet och däcket, du måste sträcka omslaget så mycket före applicering och du behöver flera par händer, så det är tillbaka till färgsprutningen.
Båten är klar med sprayen och som Mr Gibson sa att du har det mycket bättre med färg eftersom skadad vinyl är omöjlig att reparera. Han borde veta att han brukade slå in 18 fotfot bland annat. Varför pratade jag inte med honom först.
Drömmen fanns, erfarenheten saknades. Älskade metallic finish men det är inte att vara.
Framåt och uppåt och iväg för att titta på 18 foters tävling runt Sydney hamn i JJ Giltinan. Självklart på datorn
Beslutstid på färg
Det har varit en lång process att försöka sortera färgen till båten. Jag kunde använda min beprövade 2 -pack polyuretan som jag vet är hård och hållbar, men jag vill spraya för att däcken ska se smarta ut. Som ni vet försökte jag använda vinylfolie men båtens kurvor visade sig vara för mycket.
Sökandet tog mig att spruta burkar med epoxi, emalj och andra ytbehandlingar men jag stötte på en industriell akrylbaserad färg i en sprayburk. Den är konstruerad för reparation av industriella beläggningar inomhus eller externt. Det är en risk jag vet men jag förberedde ett prov i eftermiddag och det har bra färg, är hårt, flexibelt, bra UV -egenskaper och motståndskraftigt mot repor. Databladet finns här:
http://www.farnell.com/datasheets/3165638.pdf
Så det fortsätter imorgon och vi får se hur färgen fungerar. Bilderna nedan visar det nya sprayutseendet på ett prov och effekten jag försöker undvika när jag målar 2 -pack polyuretan. Jag ska visa resultatet i morgon och sedan se hur det sliter när vi seglar.
Problem med batteriet
Skrovets passform är komplett med köl och roder i perfekt inriktning. När jag gick för att testa elektroniken började jag ladda batteriet och märkte direkt att det svullnade. Jag tog bort batteriet utanför eftersom det finns intressanta historier om batterier som blåser upp. Två till på beställning. Framstegen stoppas tills nya `PG -reservdelar och batterier kommer nästa vecka.
Varnas, håll ett öga på ditt Lipo/lifo -batteri om du inte har laddat dem på ett tag. Om de visar tecken på expansion, ta ut dem ur huset.
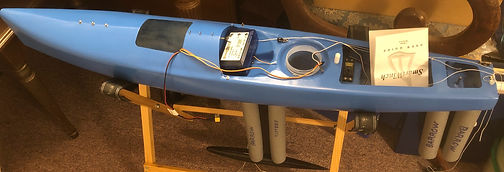
Inuti radiokrukan
Jag läste en artikel av Darren Paulic som publicerades på Facebook RC Sailing Group och finns här. Radiokontrollsegling i saltvatten.
I artikeln talade Darren om vikten av att hålla din elektricitet ur vattnet och täcka med vaselin eller kiselfett . Han lade ett lager neopren på basen av sitt batteri och mottagaren för att hålla dem borta från botten av radiokärlet för att skydda dem från eventuella vatteninträngningar. Jag tänkte ett steg längre för en enkel snygg lösning och fann att du kan använda klibbig bakre kardborre som fastnar som du vet vad, även till Correx, för att hålla batteriet och servokomponenterna separata och från botten av potten. Du kan också lägga en liten bit på änden av mottagarkablarna för att hålla dem 90 grader mot varandra för optimal radiosignalprestanda. Kom ihåg att placera batteriet på båtens mittlinje. Bild 38 och 39.
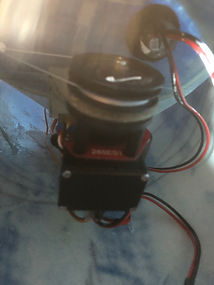
Problem med vinschen, eller var det operatörsfel (Bild 40)
Först och främst ett stort skrik till Bill Green (RMG UK) som tillhandahåller en supertjänst och är så snabb att svara på frågor. När jag demonterade och återmonterade min radioutrustning som överfördes till den nya båten kunde jag inte förstå varför när jag vände min sändare på vinschen som flyttade förbi över ett varv. Stäng av sändaren och den återvände till sin ursprungliga position. Ett samtal till Bill borde lösa problemet. Han sa med rätta att jag borde programmera vinschgränserna enligt manualen som jag inte hade kupol tidigare och se vad som händer. Jag gjorde det men det löste inte problemet.
Duh, jag kom ihåg så småningom. På en Emsworth -träningszoom hade deras man Richard Ballas, som är en radiosnurr, pratat med att ställa in felsäkert läge på sändaren. Detta gör att du kan ställa in rodret och arket på båten så att det går runt i cirklar snarare än att segla iväg i fjärran om båten tappar radiosignal. Jag hade ställt in detta för några veckor sedan men hade glömt vad det skulle göra. Varje gång jag stängde av sändaren lättades arket en och en halv varv och rodret vände 25 grader. Slå på sändaren och arket och rodret återgår till sitt ursprungliga läge. Problemet är löst, nu är det bara att finjustera vinschinställningen när den är helt riggad.
Strömvikter hittills:
Bare skrov målat 460 gram
Beslag och RC 373gms
Rod 32gms
Glödlampa och fen 2500 gram
Rigg uppskattar 235 till 300 gram
Beräkna därför 365 till 400 gram korrektorer.
Här är båten i all ära.